Create Experiment
This topic describes how you can create chaos experiments that consist of chaos faults and execute them to build and improve the resilience of your application.
Prerequisites
- What is a chaos experiment?
- What are chaos faults?
- What are resilience probes?
- How to create a resilience probe?
Steps to create an experiment
Create Environment
Before you create an experiment, you need an environment where you have to enable a chaos infrastructure. Therefore, create an environment.
To edit or delete the environment, select the ⋮ icon against the name of the environment.

Create an Infrastructure
After creating your environment, create an infrastructure within it. The chaos experiment is executed within this infrastructure.
Create Chaos Experiment
You can add one or more chaos faults to a chaos experiment and execute it. Create an experiment using the interactive guide or step-by-step with one chaos fault, namely, pod delete, which has one resilience probe associated with it.
Different ways of building a chaos experiment are described below.
- Blank Canvas - Lets you build the experiment from scratch, adding the specific faults you want.
- Templates from ChaosHubs - Lets you preview and select and experiment from pre-curated experiment templates available in ChaosHubs.
- Upload YAML - Lets you upload an experiment manifest YAML file.
These options are explained below.
Using Blank Canvas
-
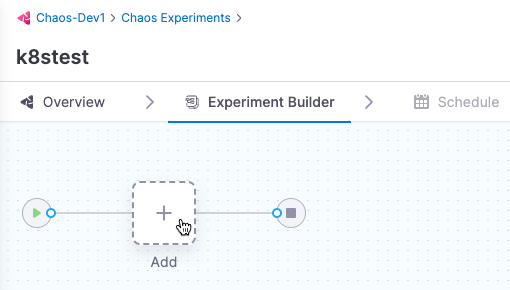
On the Experiment Builder tab, click Add to add a fault to the experiment.
-
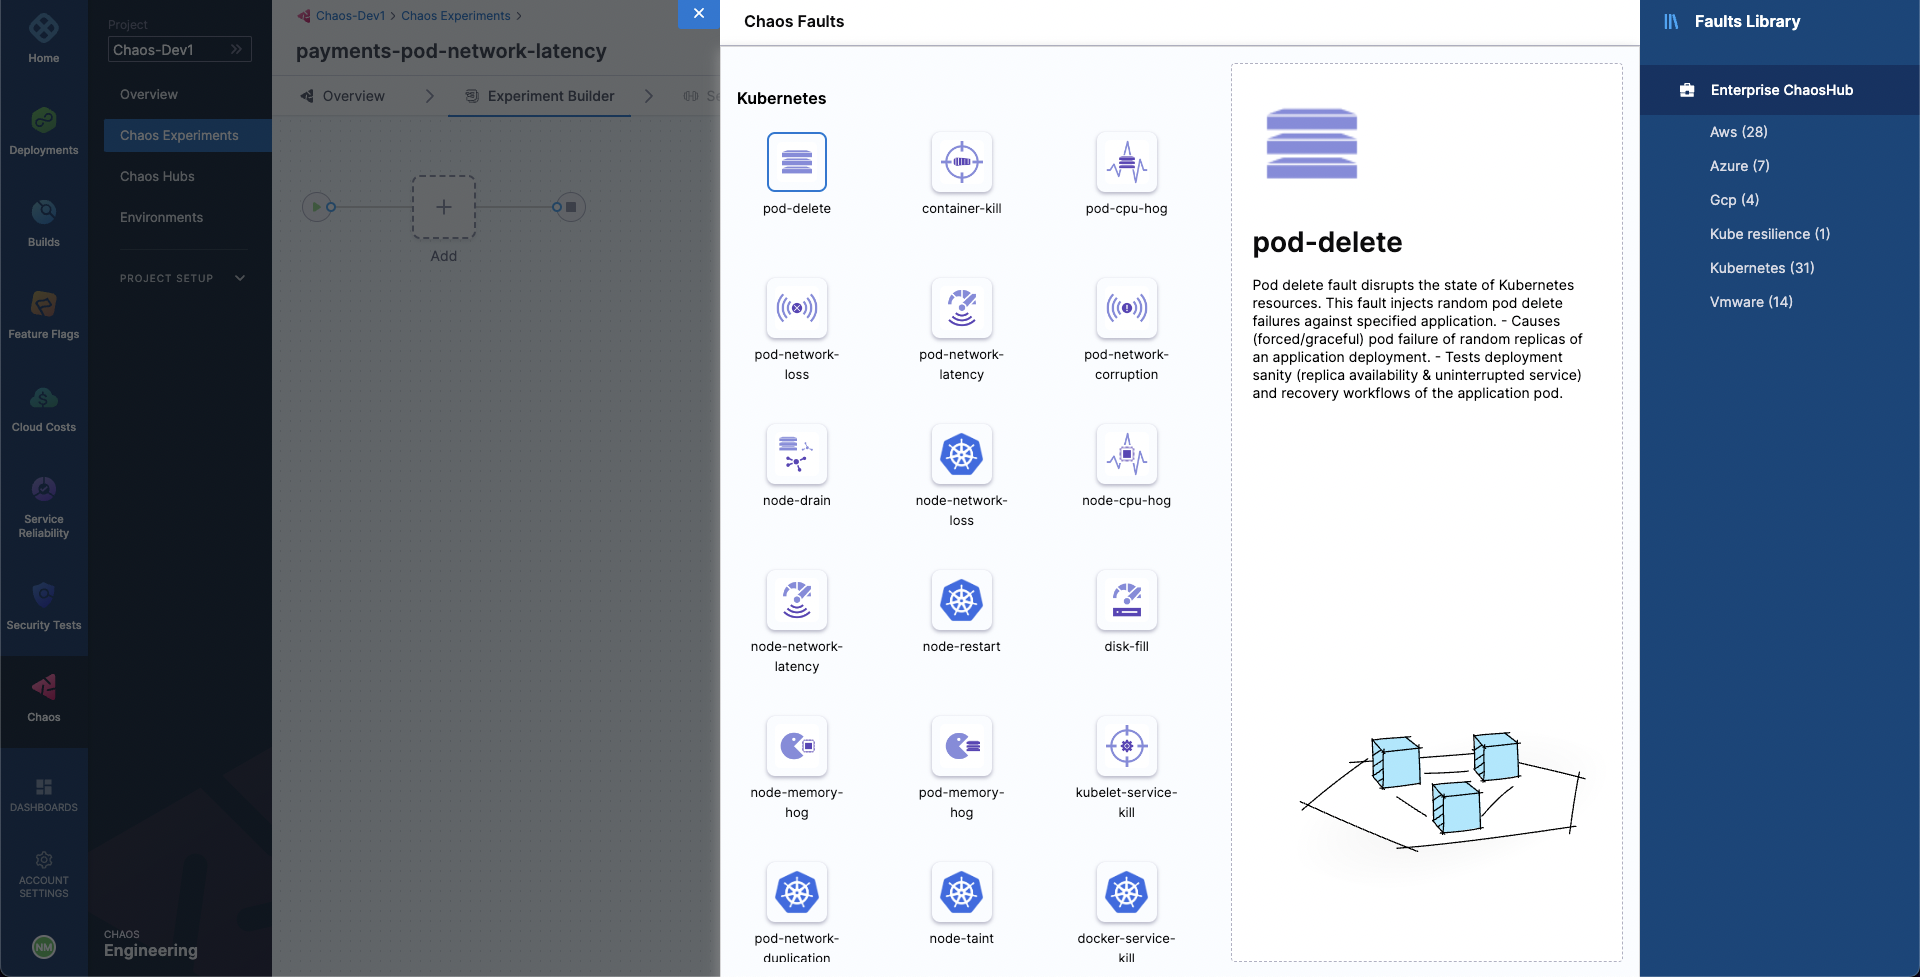
Select the fault you want to add to the experiment.
-
For each fault, tune the properties. The properties will vary depending on the faults.
-
To tune each fault:
-
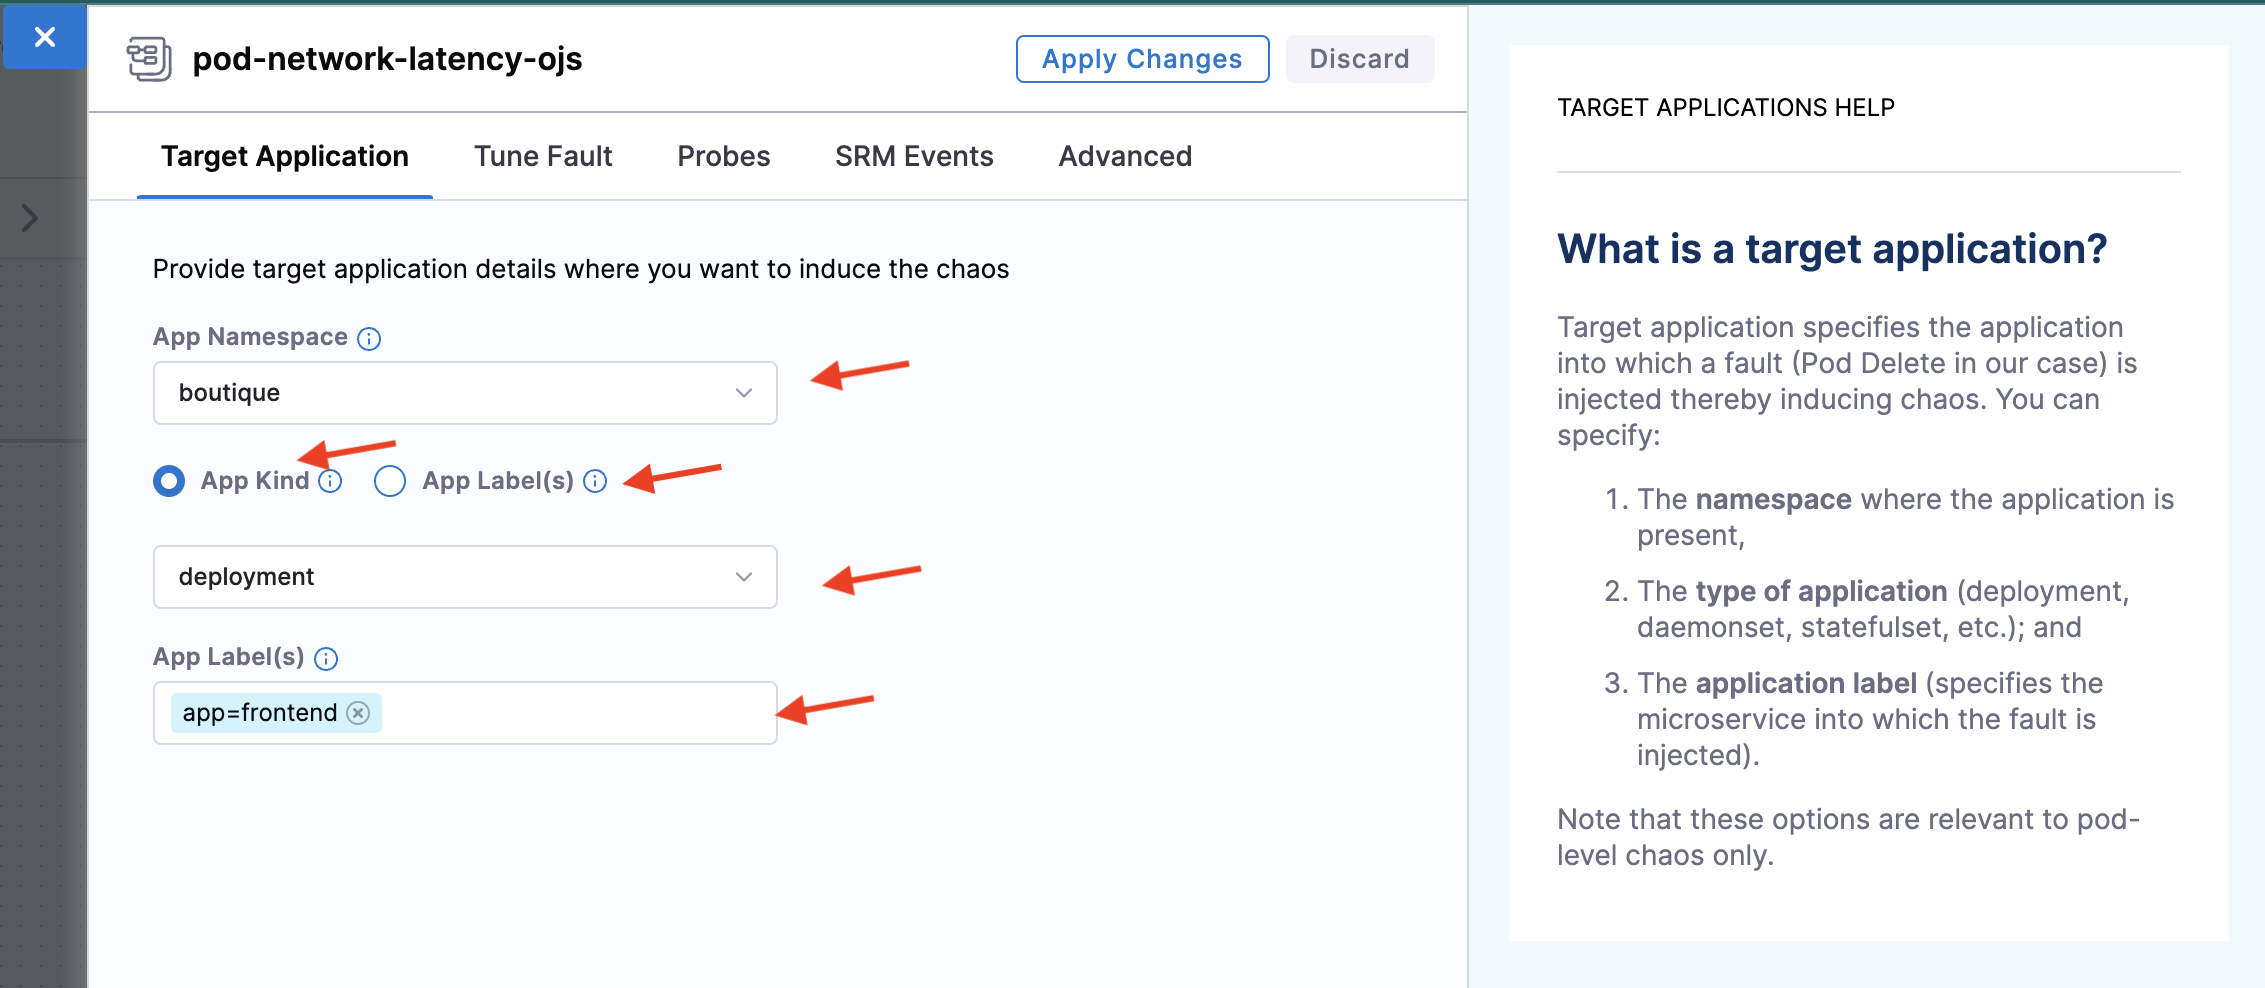
Specify the target application (only for pod-level Kubernetes faults): This allows the corresponding pods of the application to be targeted.
-
App Namespace: The namespace where your application/services is housed. This is where chaos is injected.
-
App Kind or App Label: Choose between the type of application or the label associated with it.
-
App Kind: This describes the type of your target application. Choose between "deployment", "statefulset", "daemonset", "deploymentconfig" or "rollout".
-
App Label: Label associated with the target service. For example, "nginx" app can have the label as "app=nginx".
-
-
-
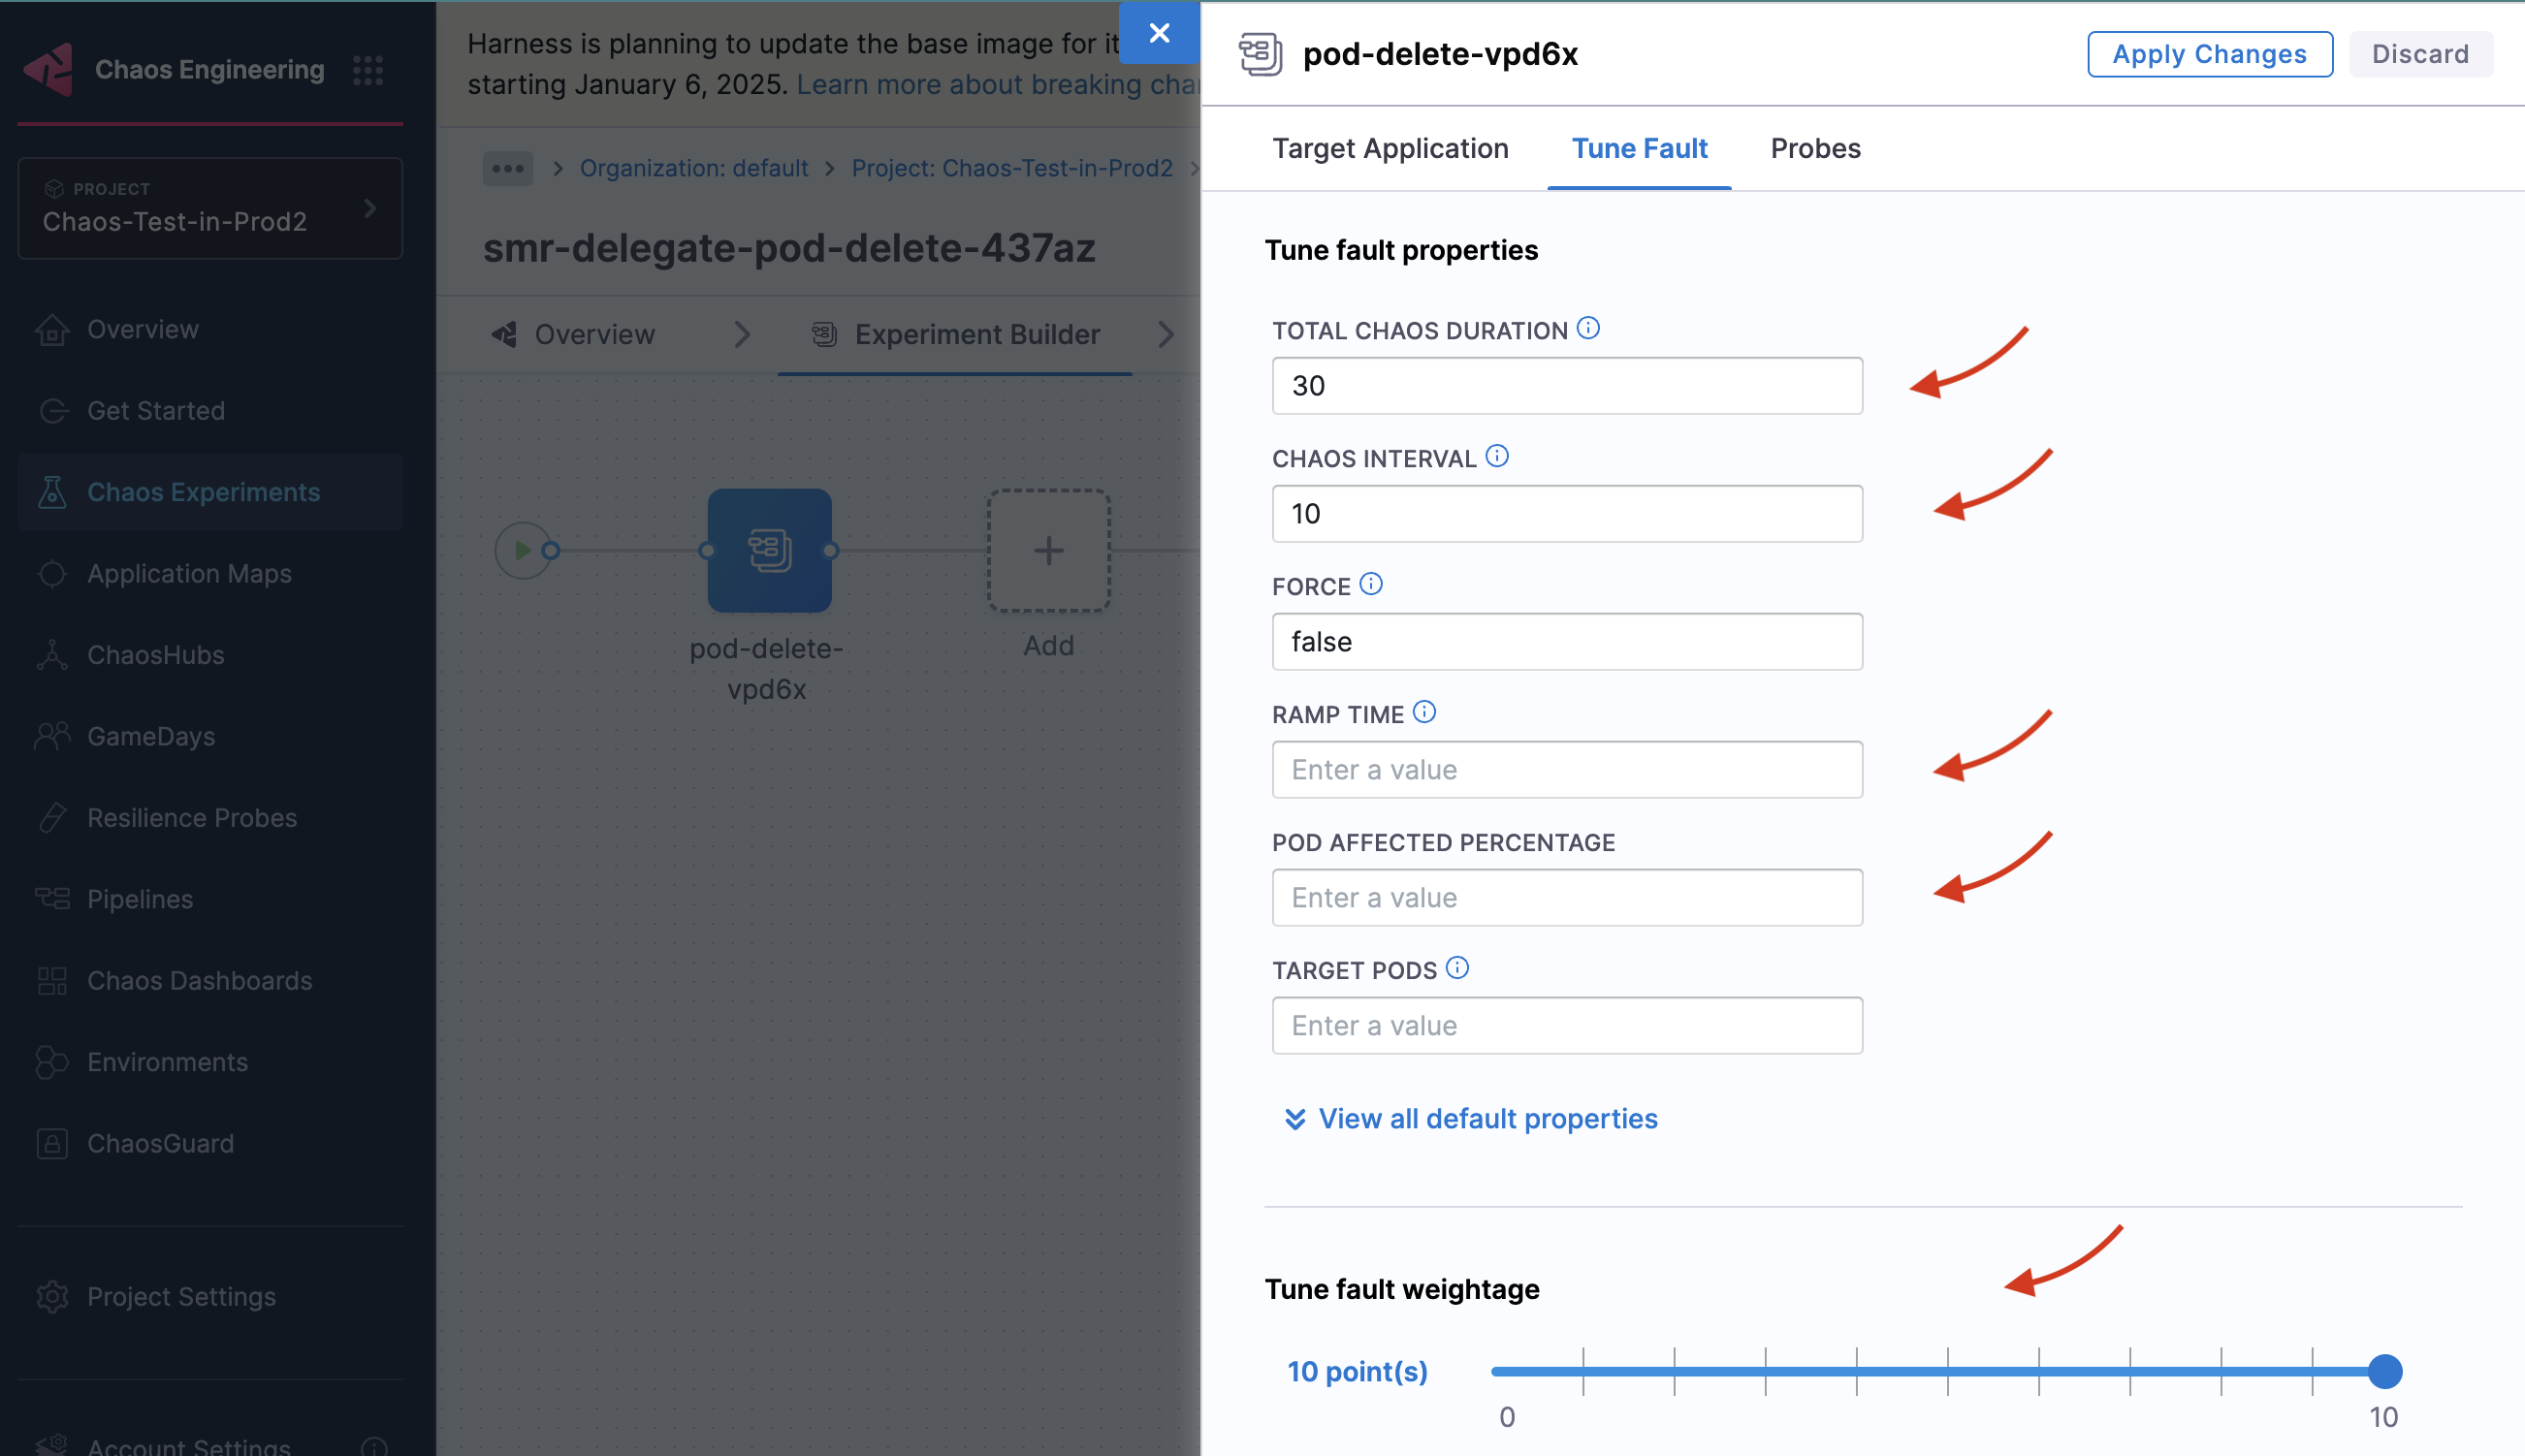
Tune fault parameters: Each fault has a set of common parameters, like chaos duration and ramp time, and unique parameters that you can customize as needed.
-
Tune Fault Weightage: Set the weight for the fault, which determines its importance relative to other faults in the experiment. This weight is used to calculate the experiment's resilience score.
-
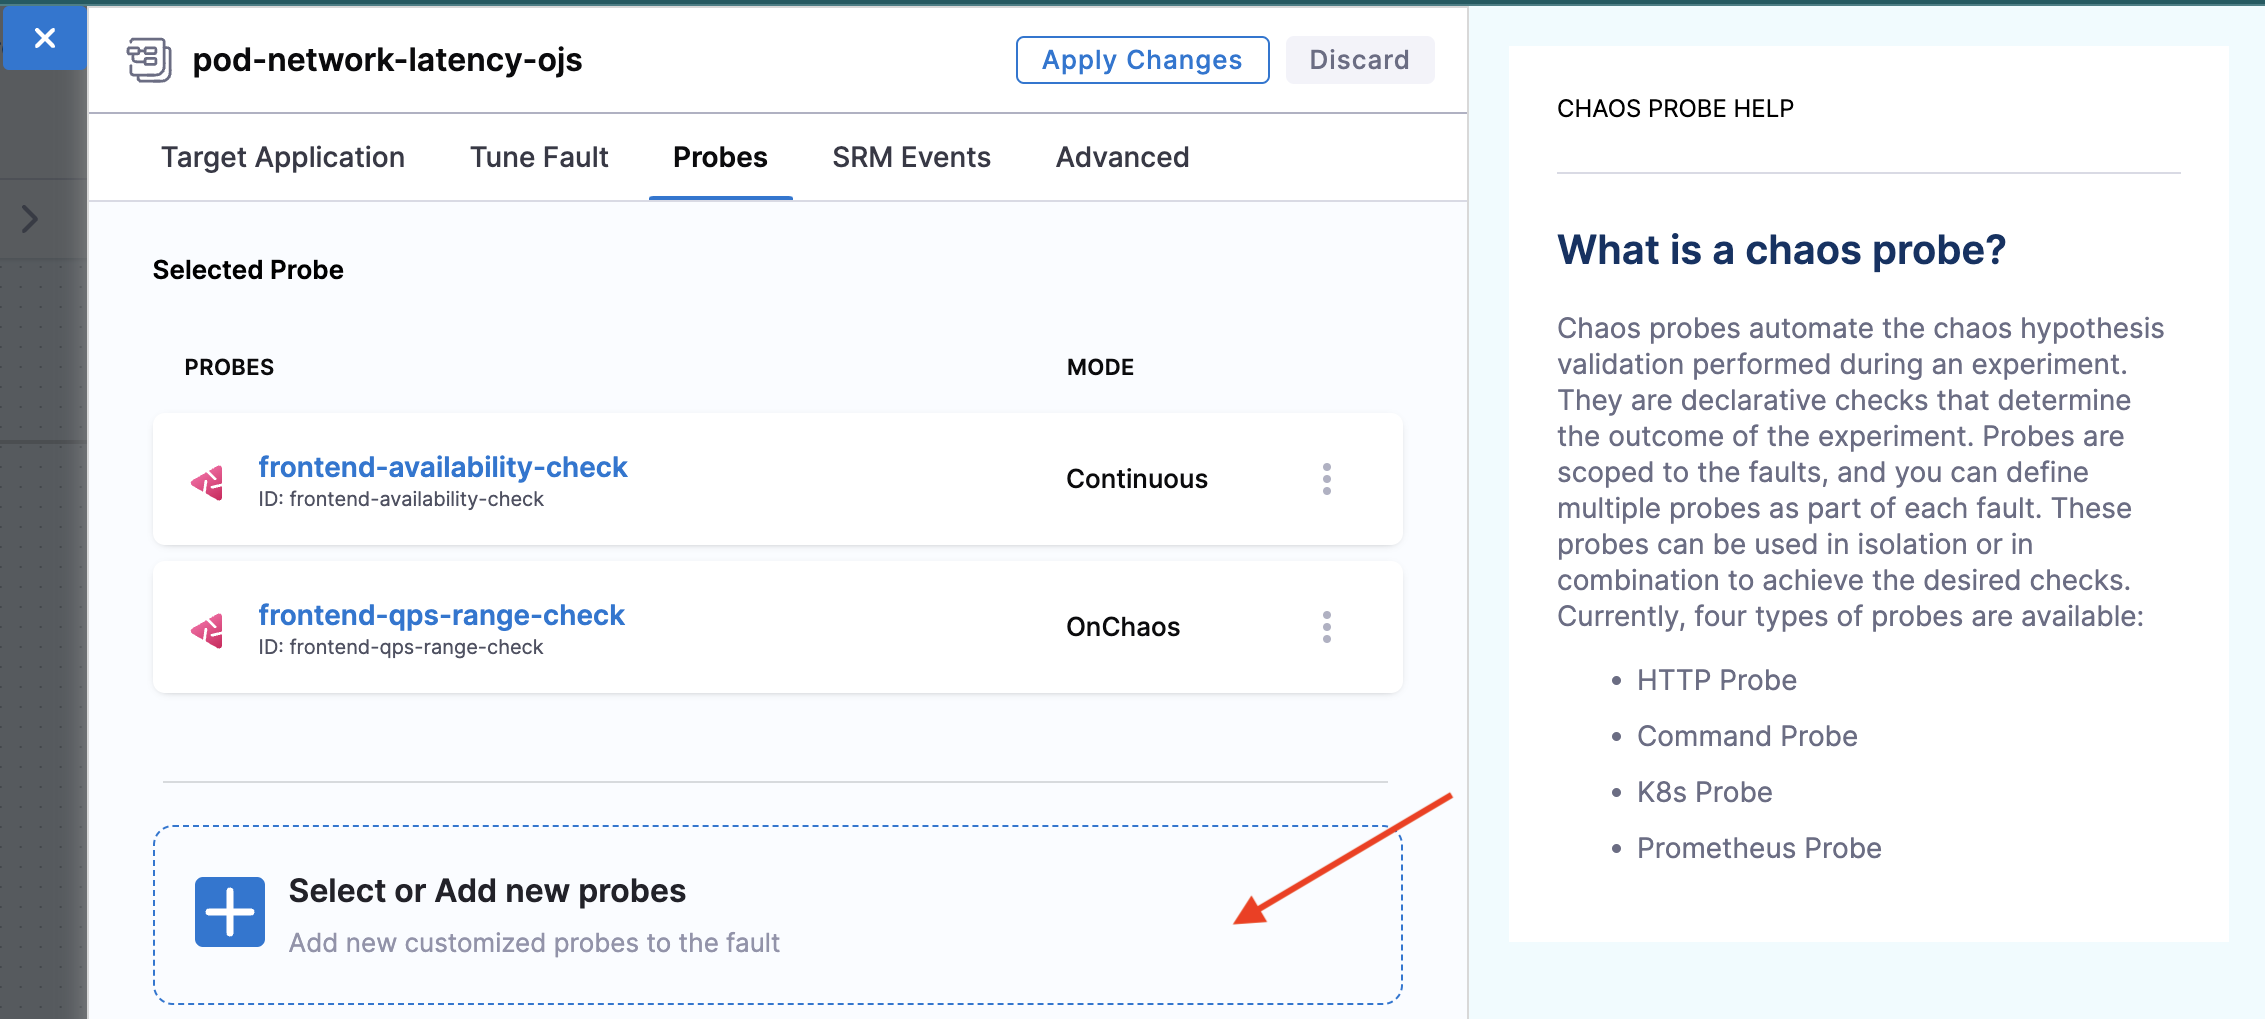
Add chaos probes: On the Probes tab, add resilience probes to automate the chaos hypothesis checks for a fault during the experiment execution. Probes are declarative checks that validate specific criteria, that help determine if an experiment passed.
-
You can configure Advanced Settings if required.
-
-
Using Templates from ChaosHubs
-
Select an experiment template from a ChaosHub.
-
Choose Experiment Type to see the available ChaosHubs.
-
Select a template to preview the faults included.

-
You can edit the template to add more faults or update the existing faults.
Upload YAML
- Upload an experiment manifest YAML file to create the experiment.
You can edit the experiment to update the existing faults or add more.
After constructing the chaos experiment using one of the three options, save the experiment.
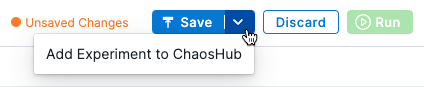
- Click Save to save the experiment to the Chaos Experiments page. You can add it to a ChaosHub later.
- Select Add Experiment to ChaosHub to save this experiment as a template in a selected ChaosHub.
Create Experiment as a Pipeline
-
Go to Chaos module and select Pipelines and click +Create a Pipeline.

-
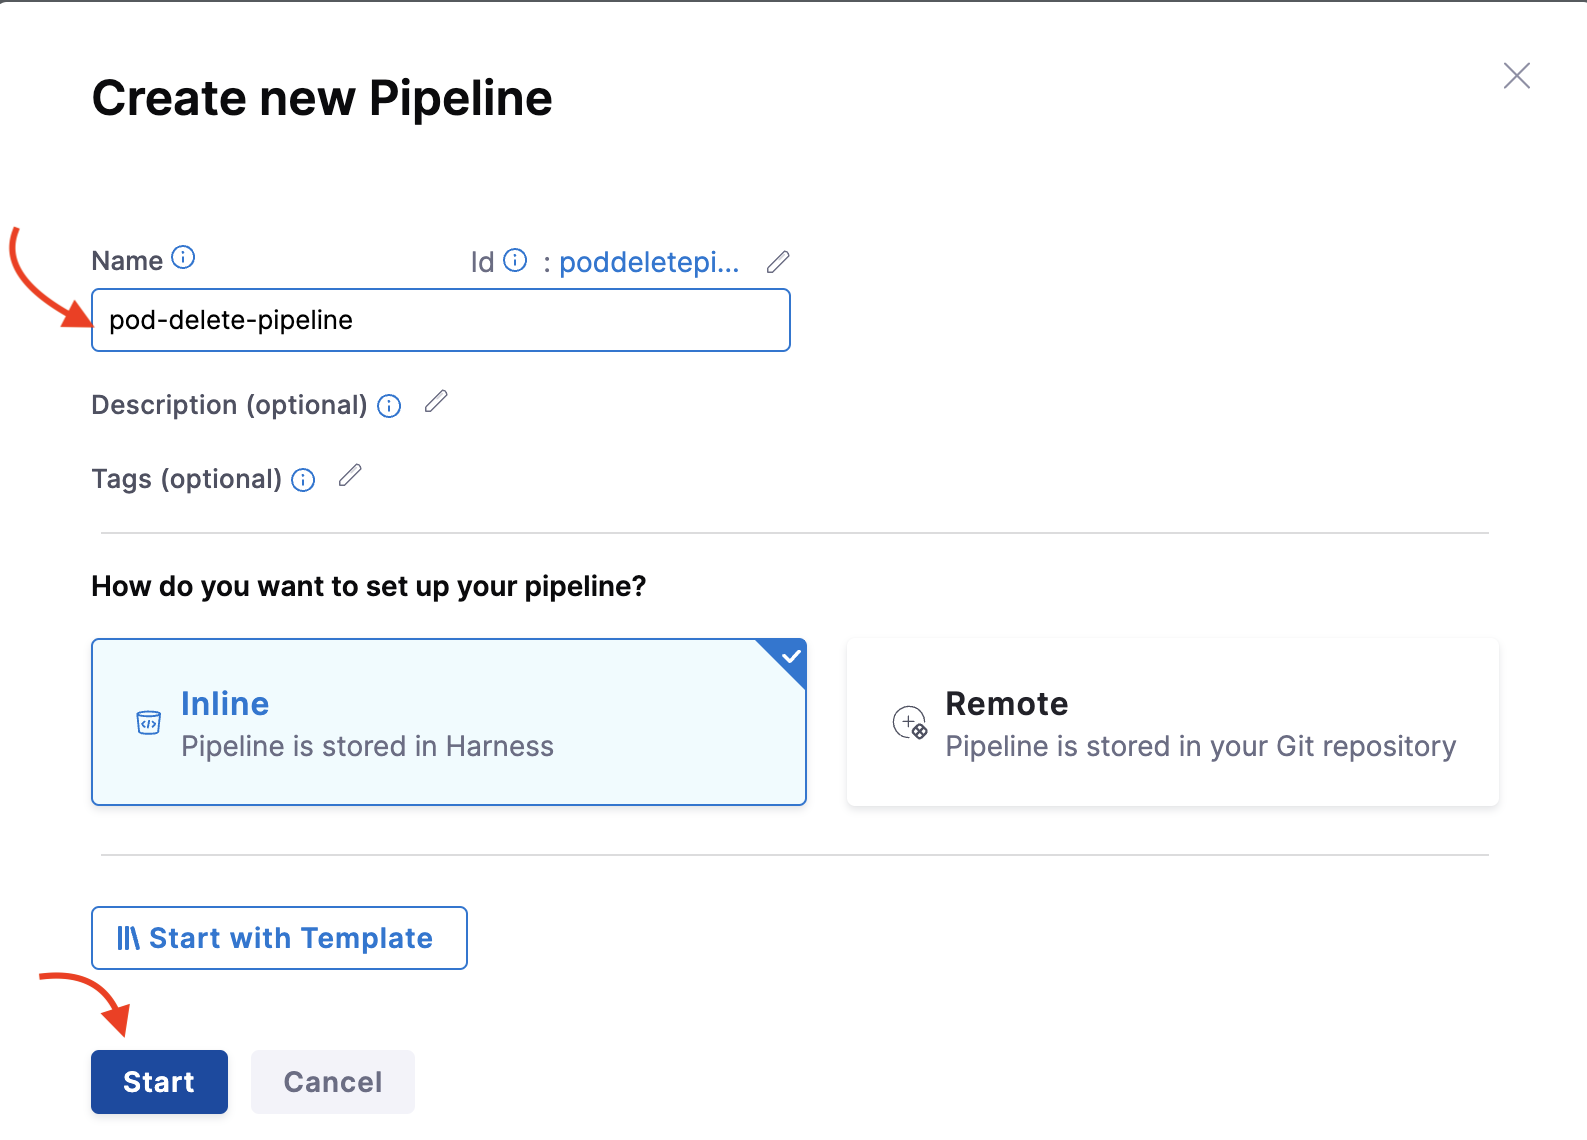
Provide a name, and click Start.
-
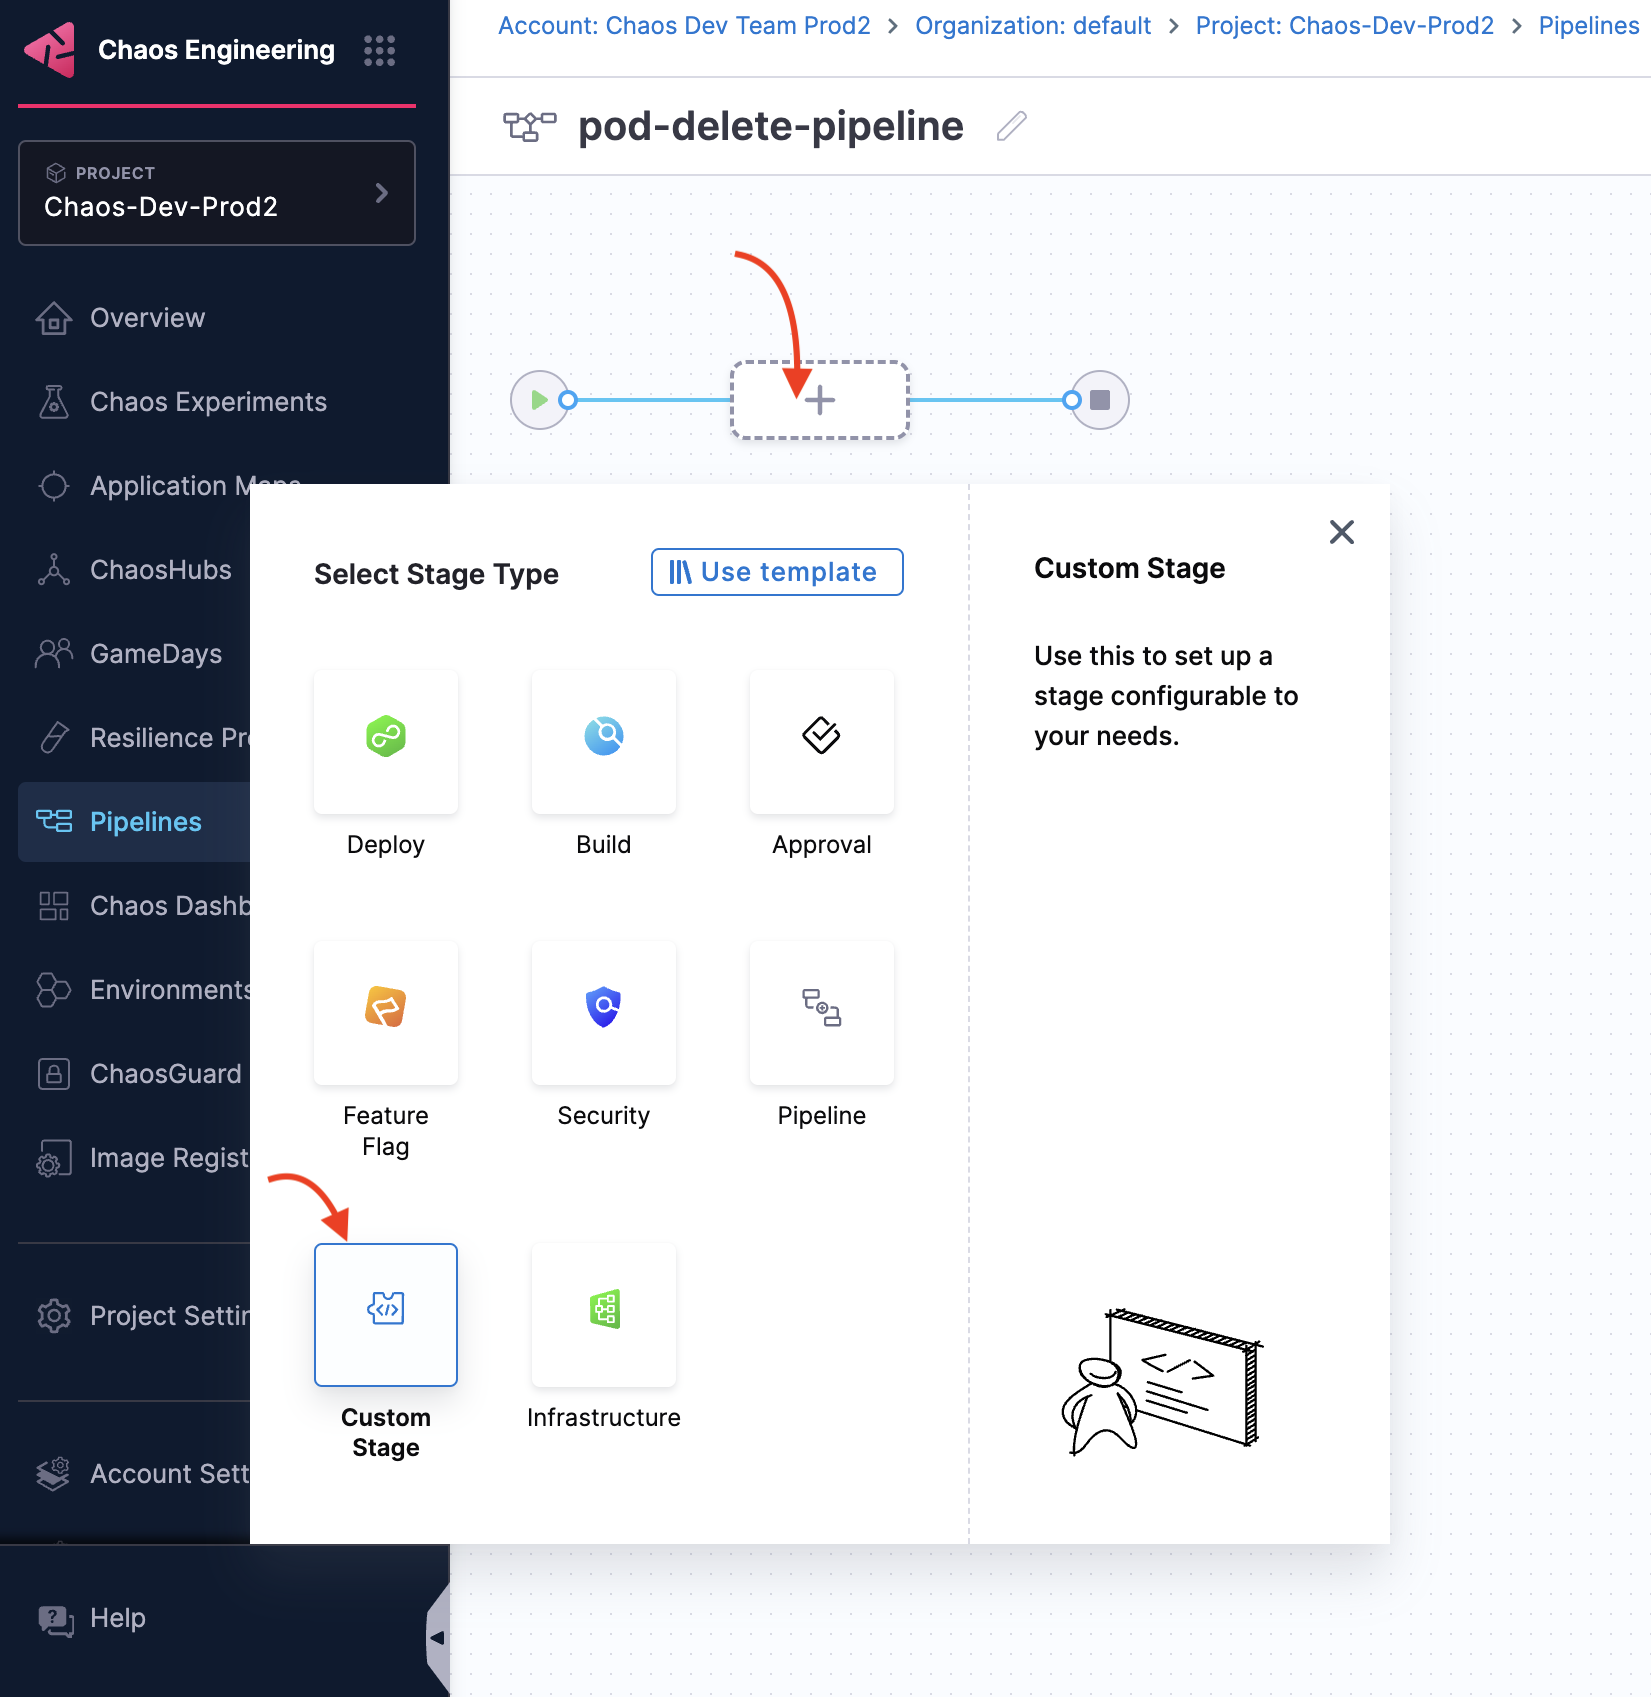
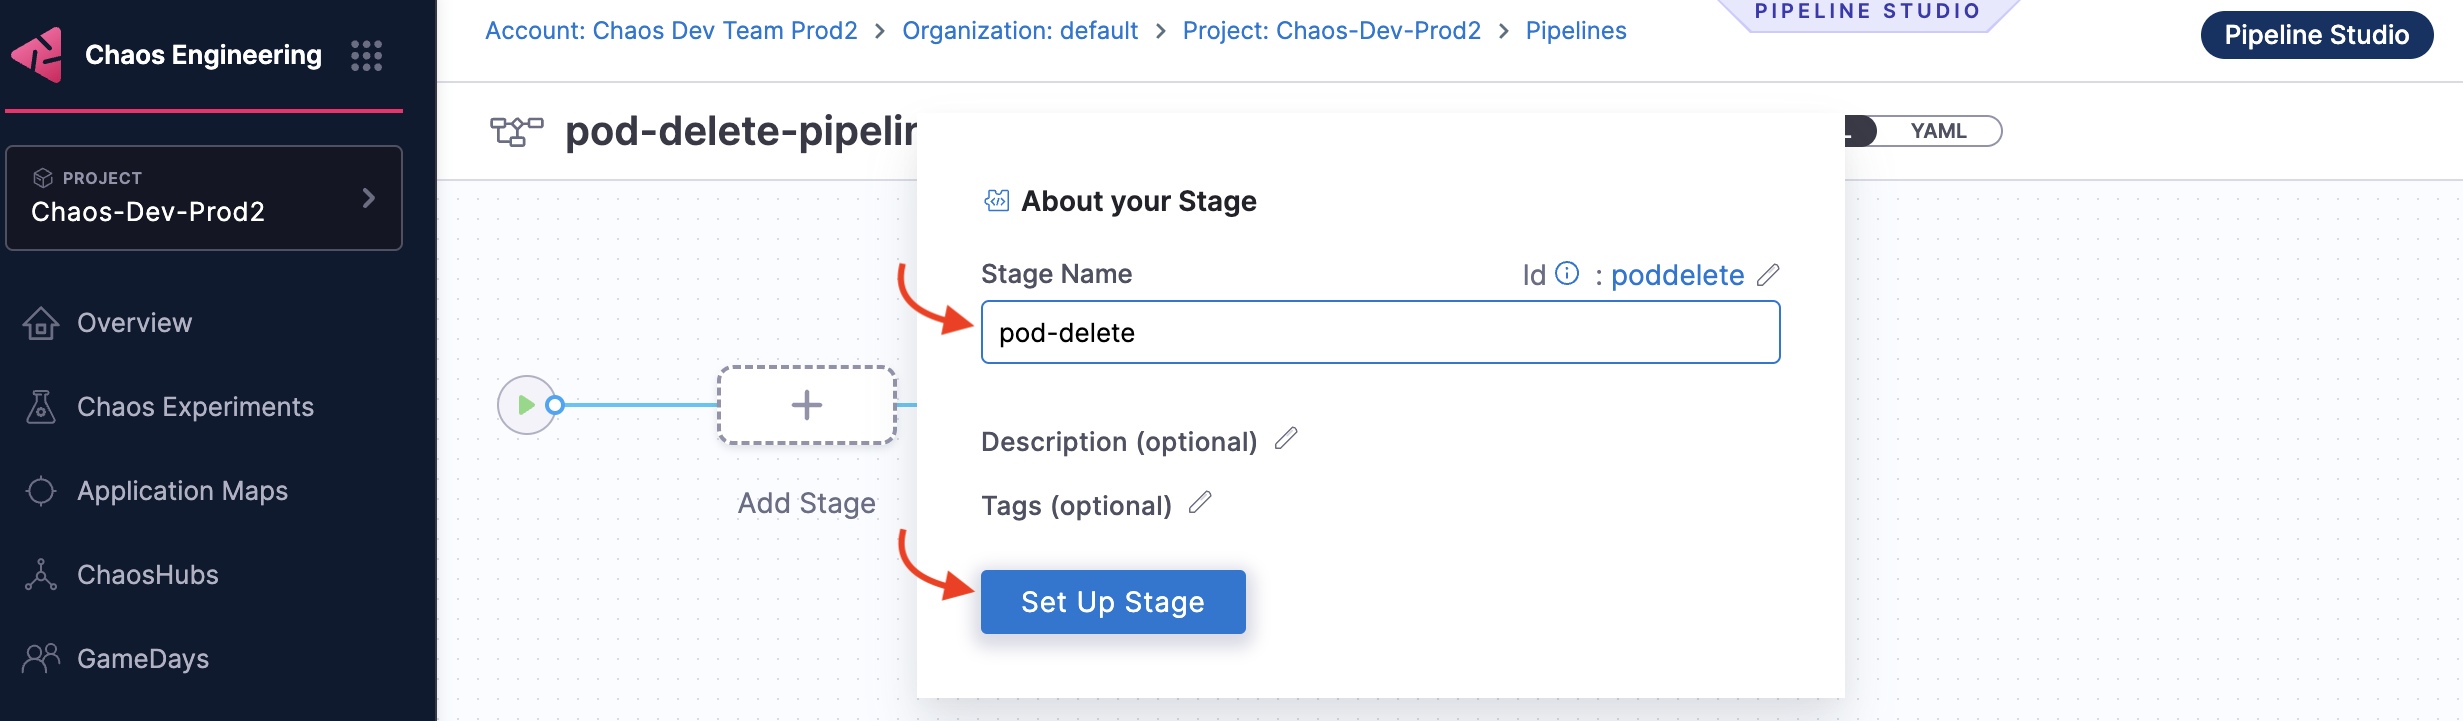
Click the + (the stage type), and select Custom Stage.
-
Provide a name for the stage, and click Set Up Stage.
-
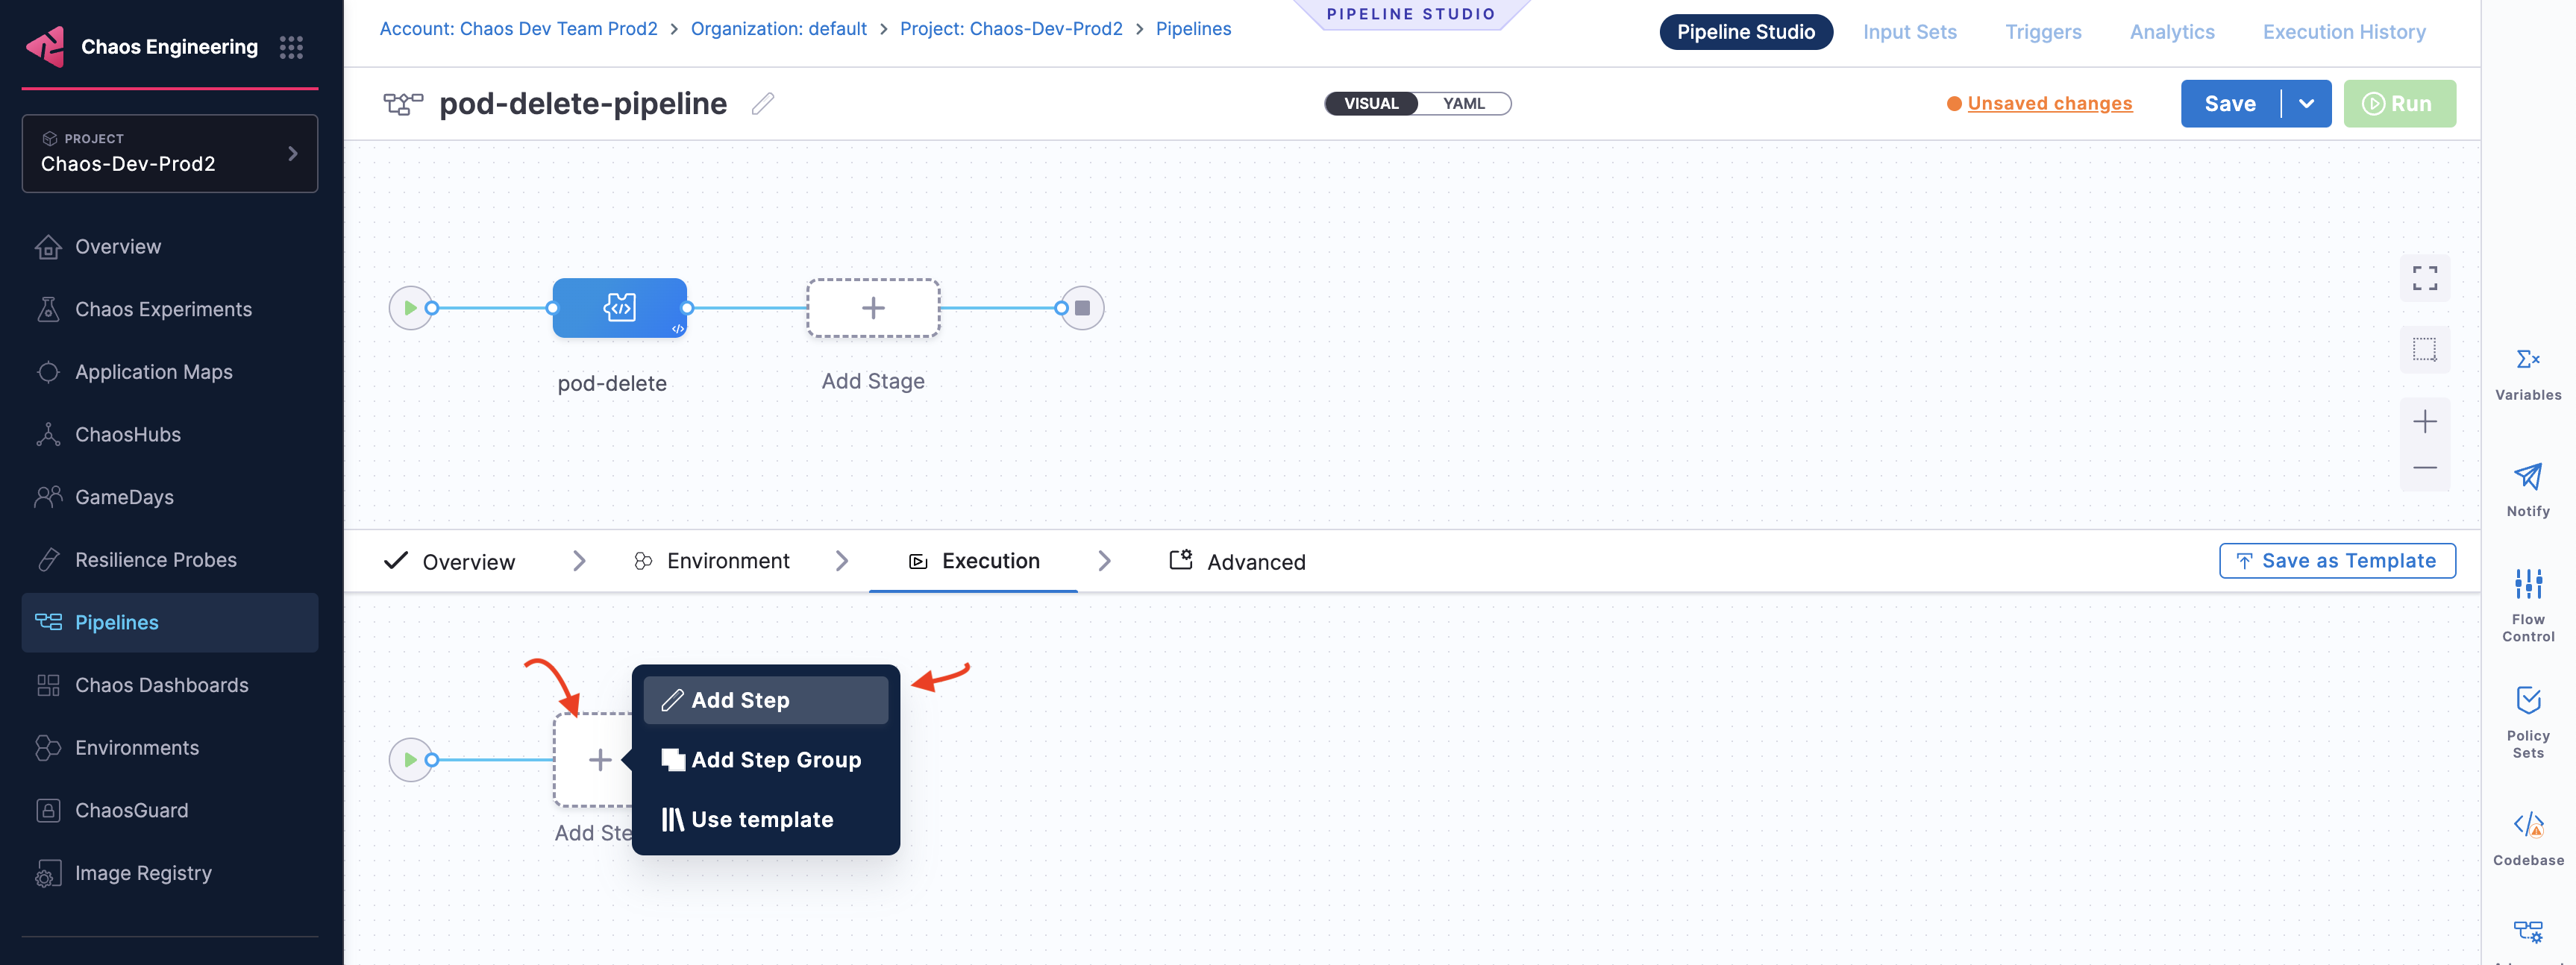
Click Add Step and choose the Add Step option.
-
Choose Chaos from the Step Library.

-
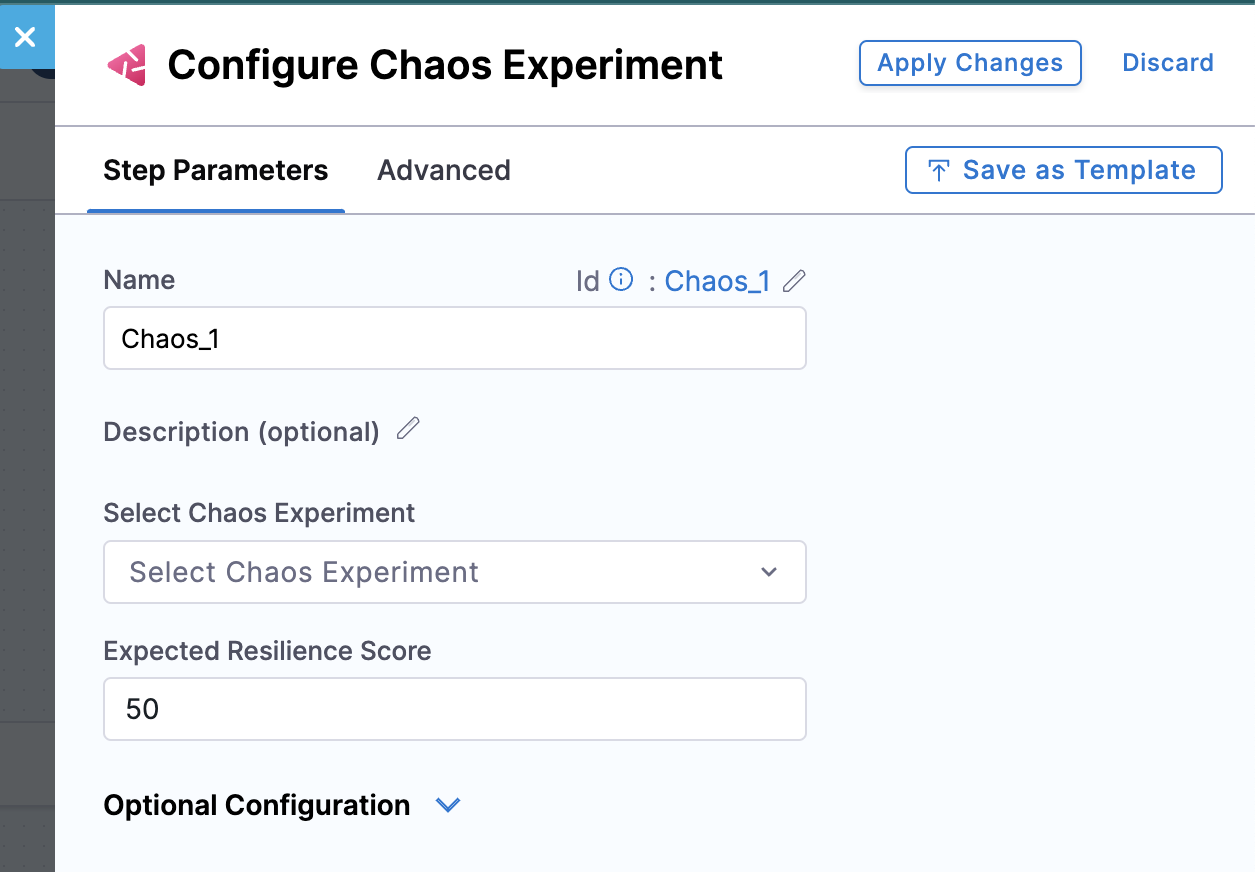
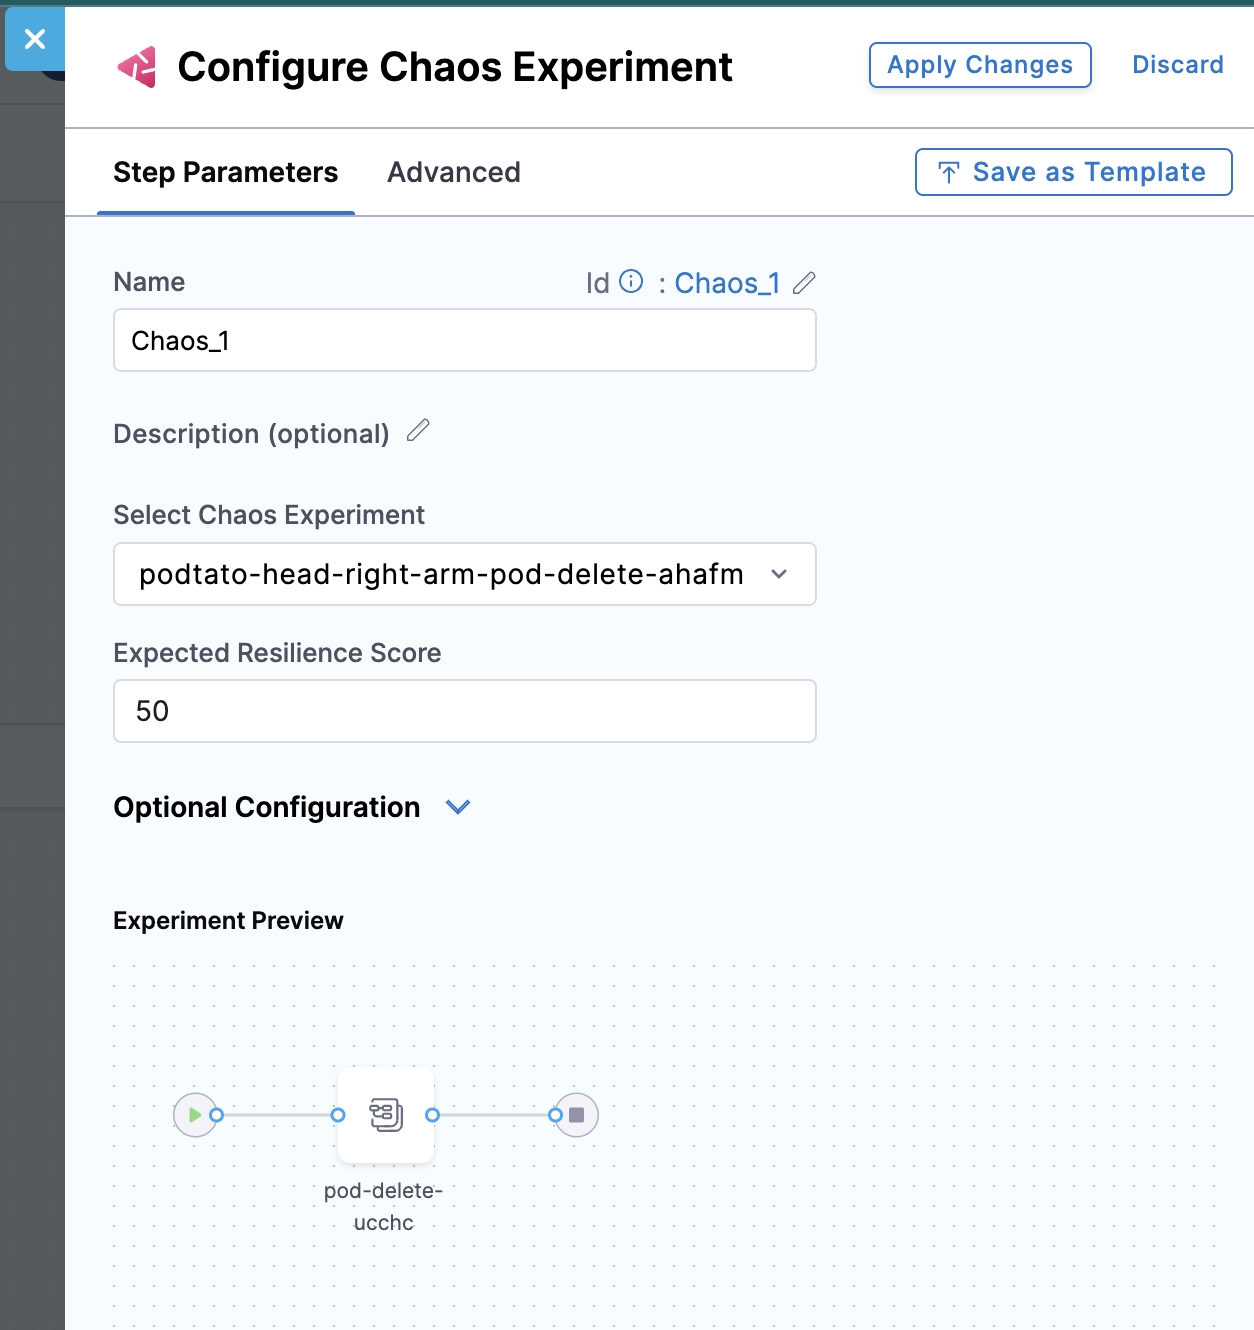
Provide a name, select the chaos experiment.
-
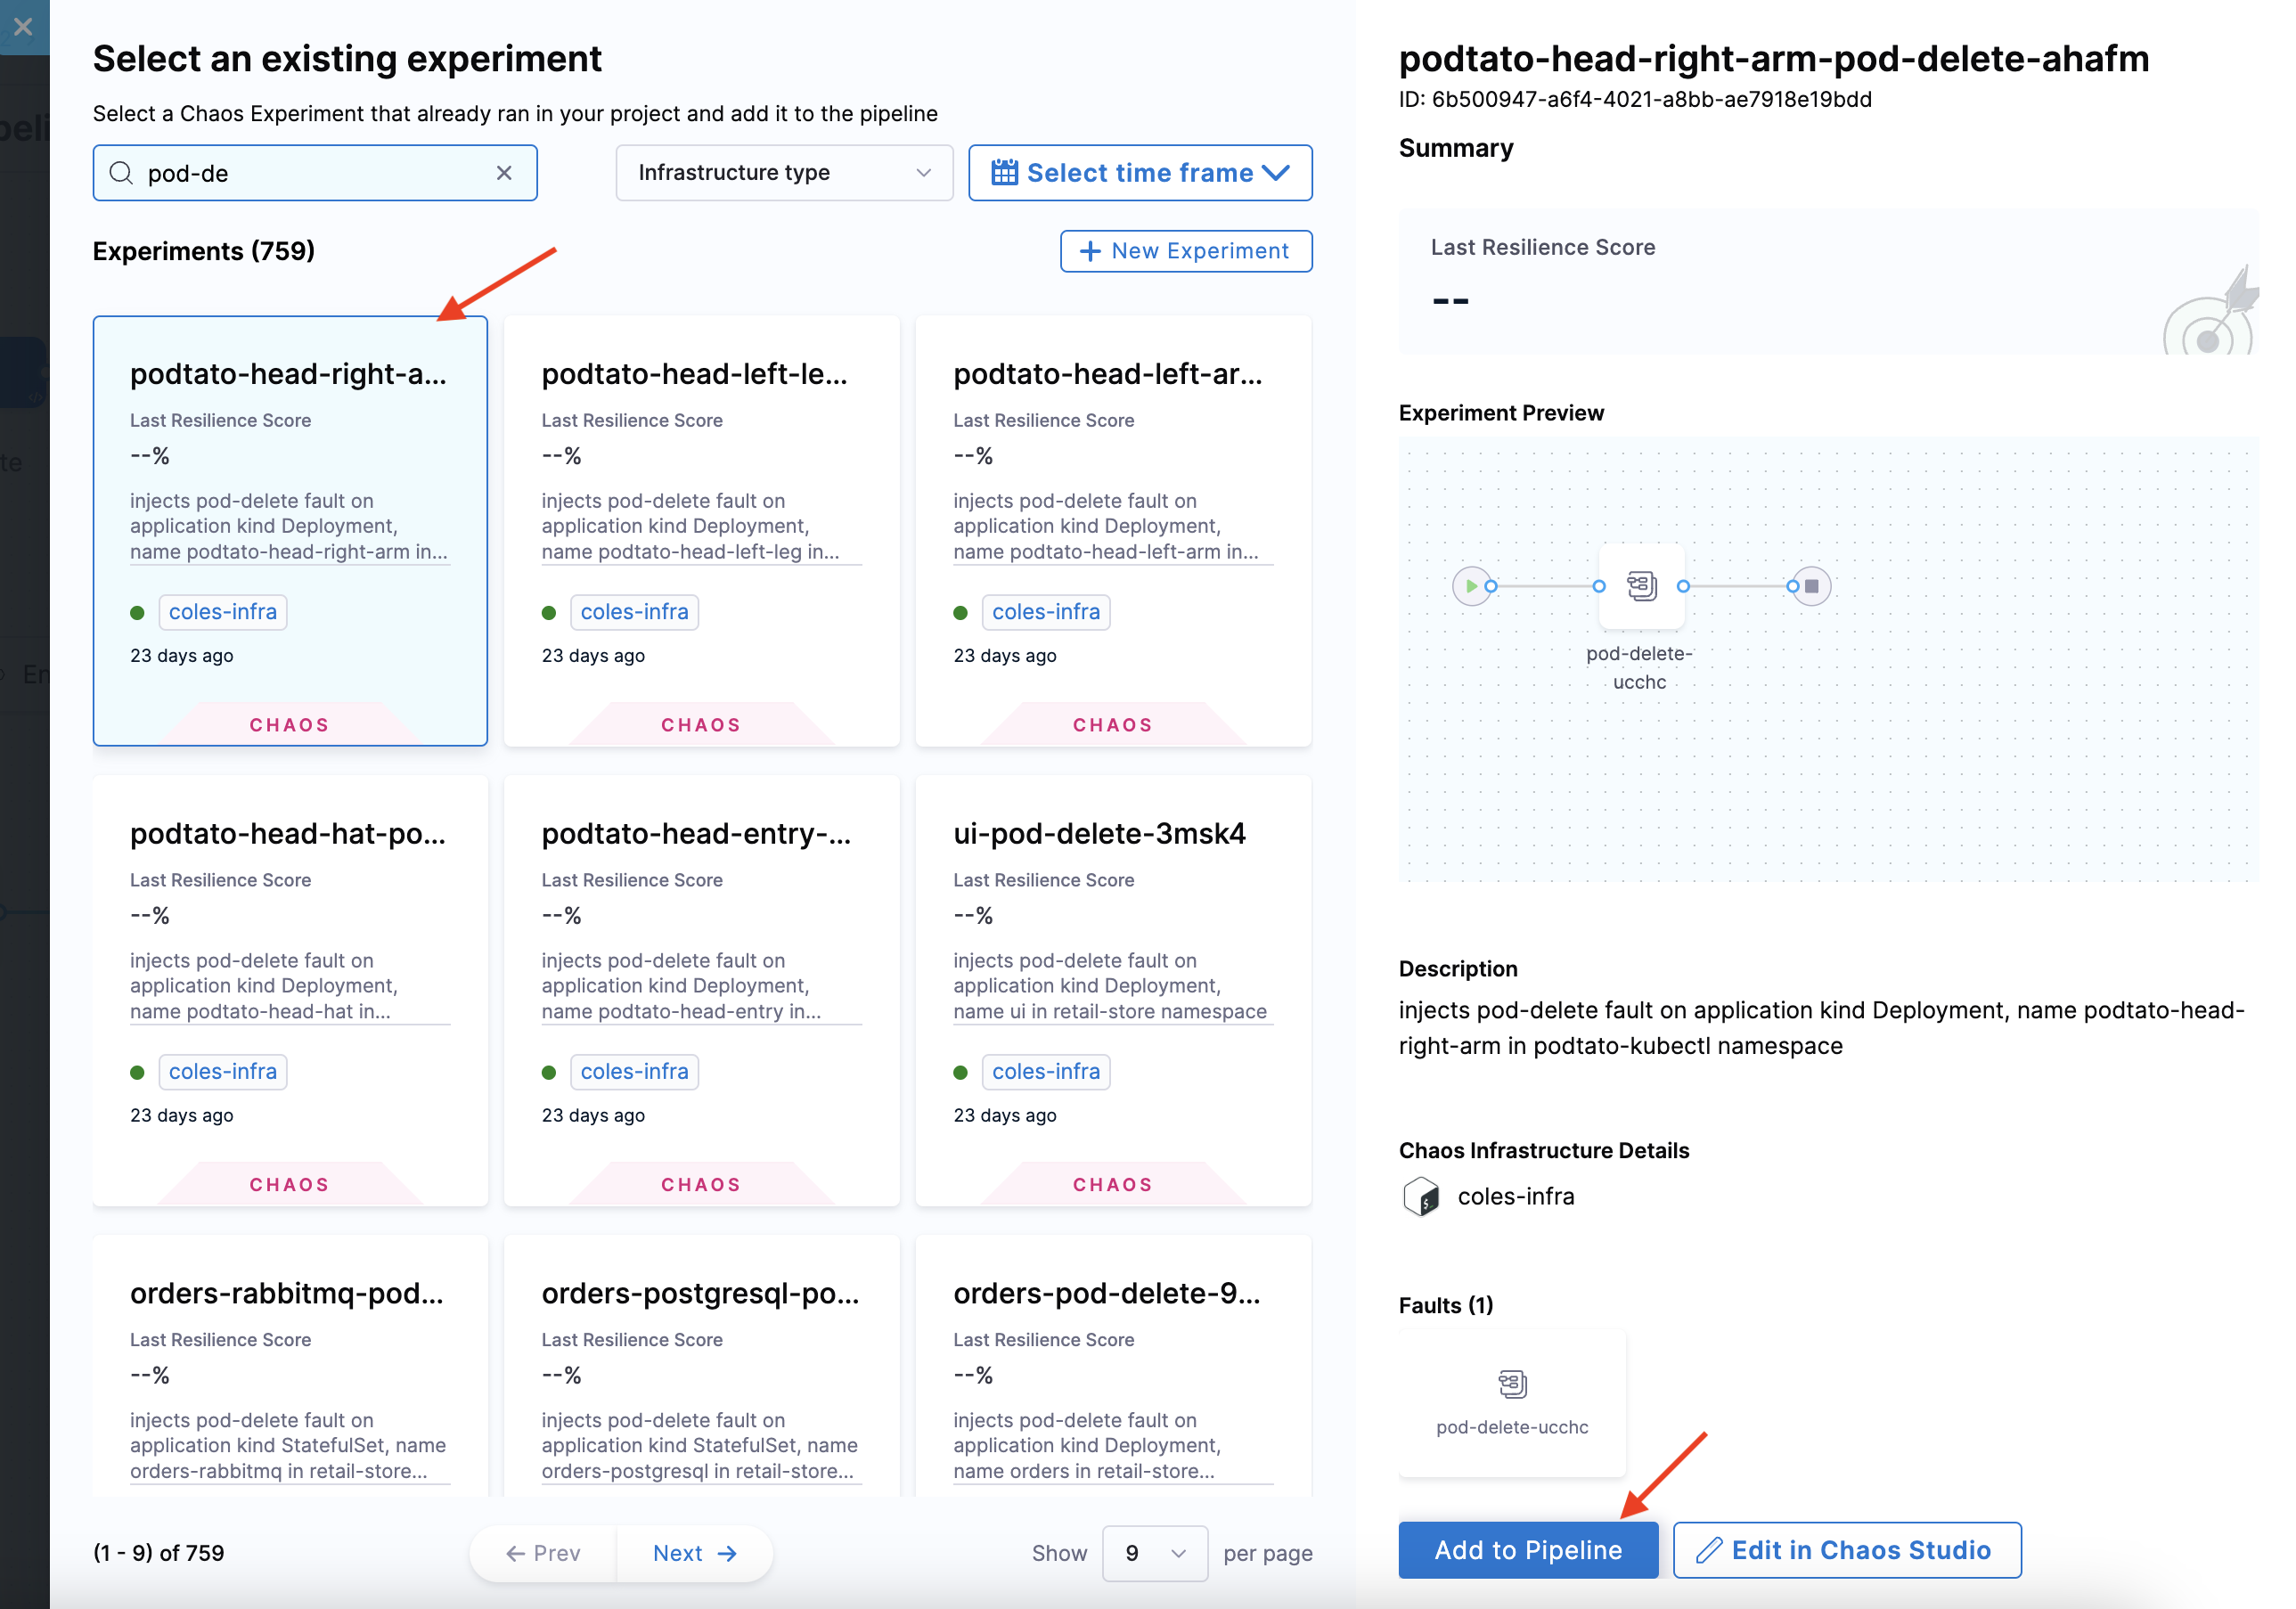
Choose from the list of chaos experiments, and click Add to Pipeline.
-
Click Apply Changes.
-
Click Save.

For more information, go to Pipeline concepts and Pipeline Modeling Overview.